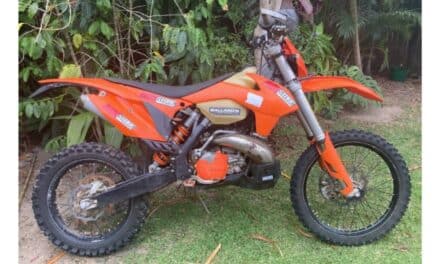
If you’re having trouble starting your dirt bike, or your bike is misfiring or backfiring, you may want to test your stator.
Unfortunately, your dirt bike stator is one of those things that you will sooner or later have issues with.
Time, exposure to the elements, the extra vibration of dirt bike riding vs road riding, and the constant demand to produce energy all factor into your stator eventually failing.
There are a number of tests you can do to check your dirt bike stator using a multimeter. These include checking the resistance and output of your stator, checking for things like insulation breakdown and broken wires in your stator, the well-being of your exciter coil, ignition circuitry, and crank position sensor, as well as your battery output.
The tests you will run will vary depending on your dirt bike make and model, and the type of stator your dirt bike has, but there are some general tests you can run using a multimeter that suit most dirt bike stators.
By testing your stator you might find that in fact there is nothing wrong with your stator at all and this can narrow it down to other possible issues such as a faulty battery.
In this article, we’ll run through some stator basics, tell-tale signs of a bad dirt bike stator, and provide a step-by-step guide on how you can test a motorcycle stator using a multimeter.
What is a dirt bike stator?
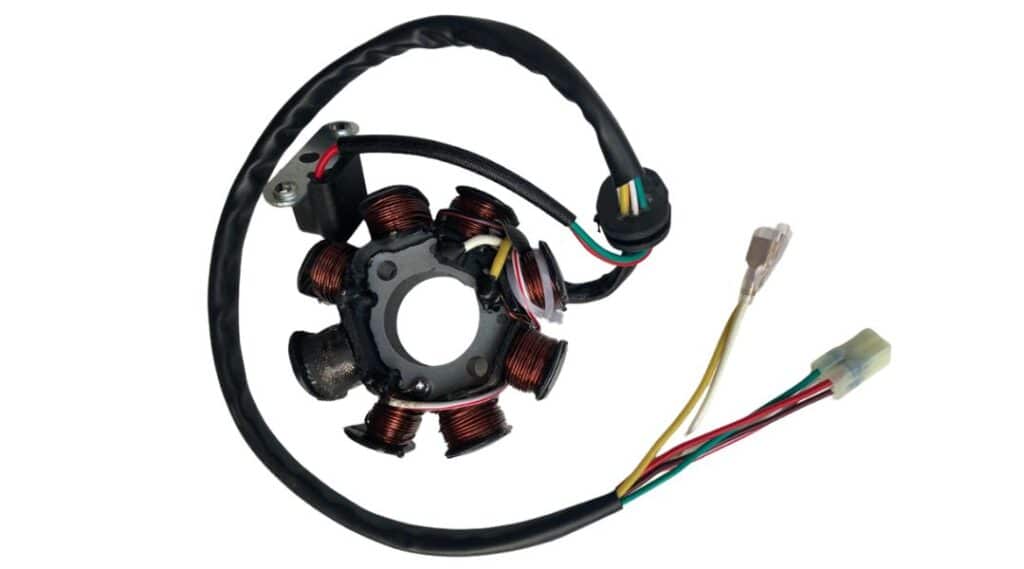
A dirt bike stator or motorcycle stator (I’ll use these terms interchangeably) is a vital part of your motorcycle’s electrical system.
Put simply, your battery (if your bike has one of course) isn’t able to support these electrical components of your dirt bike on its own.
It relies on the stator to keep it charged and generate alternating current (AC) that is converted to direct current (DC) via your dirt bike’s regulator/rectifier, which can then power the varying electrical components of a motorcycle such as the ignition, fuel injection, lights, fuel pump, starter, and any other electrical functions.
Sometimes referred to as an alternator, the stator is actually just the stationary part that sits within an alternator along with numerous other power-producing components, and generally includes a sensor to tell the spark plug to do its thing.
Because of the size and weight of an alternator, motorcycles use a stator system instead.
Types of dirt bike stators
A dirt bike stator will either be single-phase or three-phase, with most older models or race bikes being most likely to use a single-phase stator. The difference between a single-phase or three-phase stator is the amount of power that can be produced.
A KTM 300 for example, has a single-phase stator due to it needing only a basic electrical supply, while a DRZ400 has a three-phase stator to its greater electrical requirements.
Single-phase dirt bike stators produce a lower amount of power and are more suited to dirt bikes that don’t have much demand for electrical power, for example, a bike that has no lights and no starter motor.
Three-phase dirt bike stators are more suited to modern dirt bikes that require a higher electrical load to power the ignition, fuel injection, lights, and other modern power-sucking accessories.
Bad stator symptoms
Unfortunately, due to the thin copper wiring, the repeated heat cycles (hot and cold then cold again, and again and again…) dirt, junk, and the constant effort to produce electricity, dirt bike stators are prone to wearing out and in need of repair or replacement.
But the first thing is identifying the symptoms of a bad stator so you can narrow down whether or not you need to test your stator.
Some of the most common tell-tale symptoms of a bad stator include;
- your dirt bike simply is not starting
- your spark is weak or intermittent or getting no spark at all
- the battery is not getting any charge
- your dirt bike is backfiring
How to test motorcycle stator
Before you start testing your motorcycle stator you will need a few things;
Information about the stator specific to your dirt bike make and model (you may need to locate your user manual or service manual to find some of the below information).
- where your stator is located on your motorcycle
- how to access the wiring connections of the stator
- what tools you will need to access the stator connections
- what is the specified resistance (OHMS Ω range) for the stator on your motorcycle
- what is the voltage output in alternating current (AC) for the stator before the regulator/rectifier
- the color of the wires that represent the different functions found in your stator connector
- whether your dirt bike stator is single-phase or three-phase
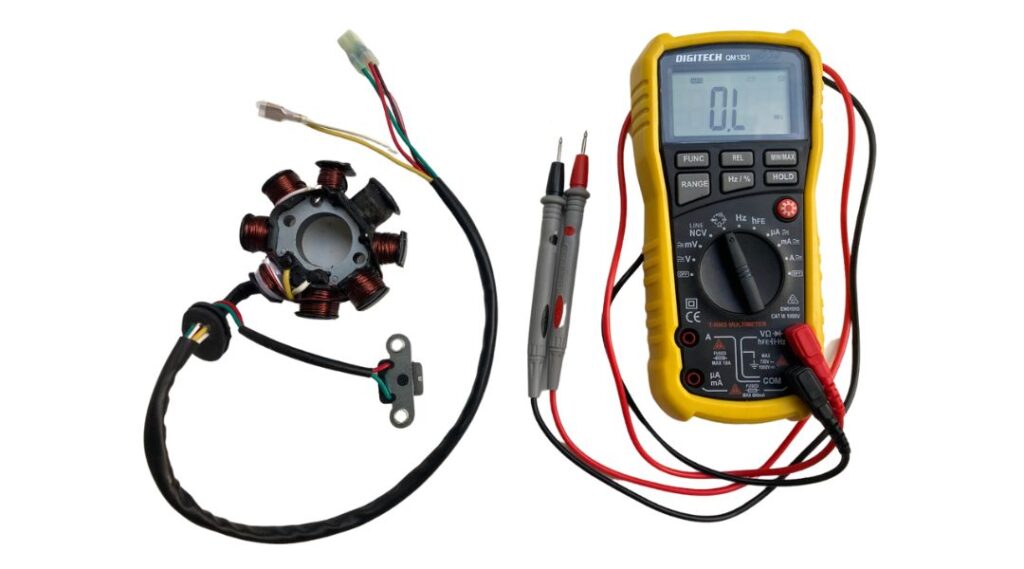
A multimeter that can provide at minimum an OHM (Ω) reading, volts AC, and volts DC. Most basic multimeters can do this.
A note on using your multimeter: Your multimeter may have multiple OHMs test settings. If you don’t get a reading and expect one, increase or decrease the OHMs test setting until you get a reading.
If you have an automatic OHM reading multimeter (like the one in the picture below) you only have one OHM reading option and the reading is automatic.
It might also be good at this point to carry out a visual inspection of your dirt bike stator. This can save you a bit of time. If there are any obvious signs of damage such as burnt or broken wires, then you can fairly safely say that your stator is the issue.
Types of Dirt Bike Stator Tests using a multimeter
To carry out a comprehensive test of your stator, there are a number of tests you can carry out to see if your dirt bike stator is in good working order (or not).
The types of tests fall under two categories, 1. static tests, and 2. dynamic tests.
Static testing simply means you are testing your dirt bike stator with the motor stopped, the bike is not running.
Dynamic stator testing means you are running the test with the motor running.
Static Test 1: Check for Faulty Stator Wire Coils
- Firstly, make sure your engine is switched off and your multimeter is in good working order.
- Locate the stator behind the stator cover on the left side of the engine. Most dirt bikes have the stator on the left-hand side of the motor, and beneath a circular cover.
- After finding the stator cover, find and follow any wiring that comes from the cover. This wire is often wrapped in a black protective covering.
- Depending on your dirt bike make and model, you may need to remove your fuel tank and other plastics to get to follow the wire and access the connector you need to run your stator tests (eg, if you have a KTM 300 you will need to remove some parts to access the stator connector).
- Next, follow the wire to a plastic connector – this is your stator connector. In some instances, there may be multiple connectors coming from the stator such as with a Suzuki DRZ400. If this is the case for your bike and you are seeing multiple connectors coming from the stator, refer to your service manual to help you identify the connector you need.
- Your next task is to disconnect your stator connector. Make sure you take the time to pay attention to how it disconnects. Care must be taken here not to pull on wires as you may break them – pull firmly on the connector plastic only.

The image above shows the stator connector detached with the wires exposed and ready for testing (1). You can see also that the stator cover of this KTM 300 has been removed (2).
You now need to test the resistance between the wires. This is a test of how easily electrical current (little electrons) is able to pass through the wire.
- First, you need to locate the terminals, these are the metal connections inside the stator connector. Make sure you test the end of the connector that leads to your stator. Now it gets a little more technical so hang in there and take your time.
- To do this locate the terminal for a single-phase stator, or the three terminals for a three-phase stator, in your stator’s connector. For three-phase stators, there should be a set of three wires that are the same color.
- NOTE: If you are unsure about whether your dirt bike stator is a single-phase or three-phase stator, or what the wires and wire colors in your stator connector are for, now is the time to refer to the user or repair manual specific to your dirt like make and model, if you haven’t done so already.
- Now that you have the information about your stator, set your multimeter into the OHMS (Ω) position.
- Place one of the probes of your multimeter into one terminal, and the other probe into another terminal (it doesn’t matter which probe you use in which terminal). Make sure none of the wires are touching any other wires.
- You should get a reading when the probes are properly placed in each of the terminals. For the specific range recommended for your dirt bike make and model refer to your service guide.
- If your multimeter is reading OL (open line or open loop), it means that you have a break in the wires of your stator and you will need to replace or repair your motorcycle stator.
- You need to repeat the test now between each of the terminals to test each wire combination;
- 1 to 2
- 1 to 3
- 2 to 3
- Each reading on your multimeter should be the same for all three test combinations.
Static Stator Test 2: Insulation BreakdownTest
The insulation on your dirt bike stator is there to ensure there is no easy route for those little electrons to travel and they go where they are meant to go!
The insulation on your stator can break down for many reasons, but often it’s because too many of those electrons have passed through at once. This creates extra heat and can melt the protective insulation.
- To check that your insulation is undamaged, place the red probe of your multimeter into the terminals you just tested, and place the other probe (black) on a clean metal part of your bike’s frame, the negative terminal on your battery, or on the motor of your dirt bike.
- If your multimeter is showing OL (this means Open Line – no electrical current can pass through) it means the insulation of your stator is in good order and the stator isn’t grounding itself to the motor and losing electrical output.
- Repeat this step for each of the terminals in your stator connector making sure you get an OL reading for each.
- If you are picking up any resistance reading on any of the wires you check, it means you will need to replace your dirt bike stator or have it repaired (often referred to as getting it rewound).
Static Stator Test 3: Crank Position Sensor
Your dirt bike crank position sensor is sometimes referred to as the pickup coil, pulser coil, or trigger coil. the crank position sensor sends a signal to tell the spark plug to fire.
- To test your crank position sensor you will need to refer to your repair manual to locate where the wires of your crank position sensor are located and the color of the wires you need to test.
- Once you have this, you again want to set your multimeter to the OHMS (Ω) position.
- Now you need to test the crank position sensor circuit by placing a probe into each of the terminals identified for the crank position sensor within your stator connector. It doesn’t matter which color probe you place in which terminal for this test.
- You should get a reading on your multimeter. Record the reading and refer to your dirt bike user manual to check if the reading is in your recommended range.
- If you are getting an OL reading it means that you have a problem with your stator.
Dynamic Dirt Bike Stator Tests Using a Multimeter
- To carry out a dynamic test of your stator with a multimeter set your multimeter to the AC setting (VAC).
- Now, with your engine OFF place the multimeter probes into the different terminals just like in our first static stator test. This can be tricky with one person and you may need alligator clips to keep your probes in place or have someone else help you.
- Start the motor and record the reading at idle. Your multimeter should record a reading of over 20-25V. If your reading is much lower than this it could indicate a problem with your stator. For the exact recommended reading refer to the repair manual for your motorcycle make and model.
- While your multimeter probes are still in position, rev the engine. The reading on your multimeter should increase when you rev the engine. If you find the reading does not increase you may have an issue with your stator.
- Repeat the test for each wire combination (three-phase stator);
- 1 to 2
- 1 to 3
- 2 to 3
Your dirt bike stator is in good health – Where to from here?
If after running all of the tests you find your stator seems to be in good condition, there may be a few other components of your dirt bike you need to check.
Test the battery
While you’ve got your multimeter out you can do a quick test of the battery.
Use the Volts DC setting of your multimeter and test across the two terminals of your battery. If you get a 12.6 your battery should be in good shape. To be sure there are further tests you can do if you suspect your battery could be the problem.
It might be your regulator/rectifier
The regulator/rectifier is what converts the AC current from the stator to DC current that charges your dirt bike’s battery. If the above stator tests are good but you are still having problems you may have an issue with your regulator/rectifier.
There are further tests you can do to check your regulator/ rectifier.
Time to replace your dirt bike stator?
So you’ve tested your stator and its died an untimely death. There’s nothing left to do but fork out the money for a new stator upgrade or have it repaired/rewound.
But wait, there may be one more option. If you have the nerve and the will, you might be able to repair your stator yourself and save a few dollars.
Be warned though, rewinding a stator is a detailed process that requires time, patience, and attention to detail. The best and safest option may be to simply buy a new stator.
Conclusion
Testing your motorcycle stator at home can sound intimidating for dirt bike beginners. It’s not as scary as it sounds though (follow our videos that show just how simple it is on a common dirt bike).
Armed with a cheap multimeter sourced from your local hardware store, and this step-by-step guide, you can save yourself some money by testing for issues at home and not paying your mechanic to diagnose the problem for you.
You’ll also learn a bit about how your bike works and the signs to watch out for in the future.
Knowledge about your bike equals freedom and independence that will let you go on some epic adventures with your bike – and that’s what we’re all about here at DIY Dirt Bike.
Happy riding!
FAQS
Do motorcycles have alternators?
Not exactly. Motorcycles have a stator which is the stationary part of an alternator. Sometimes however you will see the words stator and alternator being used interchangeably.
Difference between a stator vs alternator
A stator is the stationary component of an alternator. An alternator meanwhile is a self-contained unit that houses a number of parts that create alternating current (AC).
Because of the size and weight of an alternator, a stator system is used on a motorcycle instead.
What should a stator OHM out at?
The ohm output of your dirt bike stator will be different depending on the make and model of your bike. To get the recommended OHM output refer to your dirt bike repair manual.
What voltage should a stator put out
This varies depending on your dirt bike’s make and model. Check your bike’s repair manual to get the recommended voltage output range for your dirt bike stator.
Can you fix a stator?
Yes, you can fix a dirt bike stator. Be warned though, this is detailed and time-consuming processing. It may be safer and easier to simply buy a new stator.